Setting up locations on your site is a straightforward process that allows you to organize your space efficiently. By utilizing the "Location section" in the site info menu, you can create a structured hierarchy that helps you manage your areas effectively.
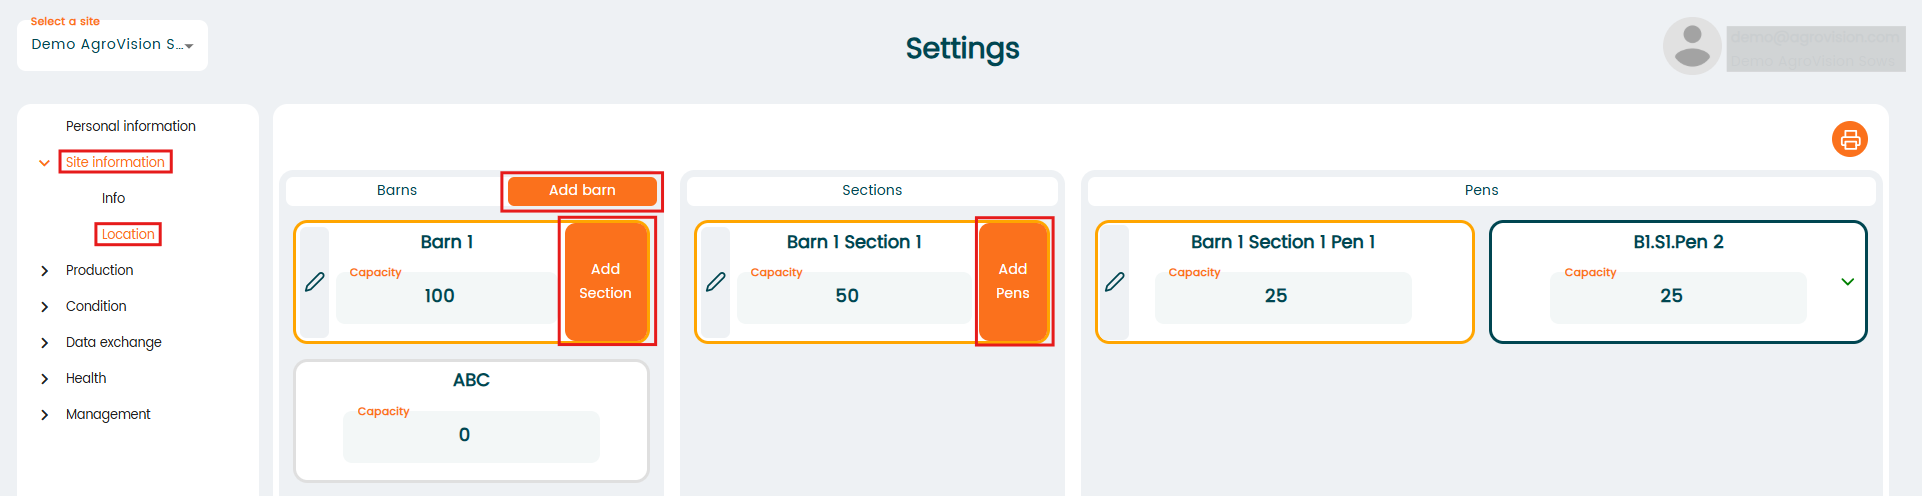
Start with creating "Barns". The first level of your location hierarchy is the "Barn." You can create multiple barns to categorize different areas of your site. To add a barn, simply navigate to the "Location section" and click on the "Add barn" option.
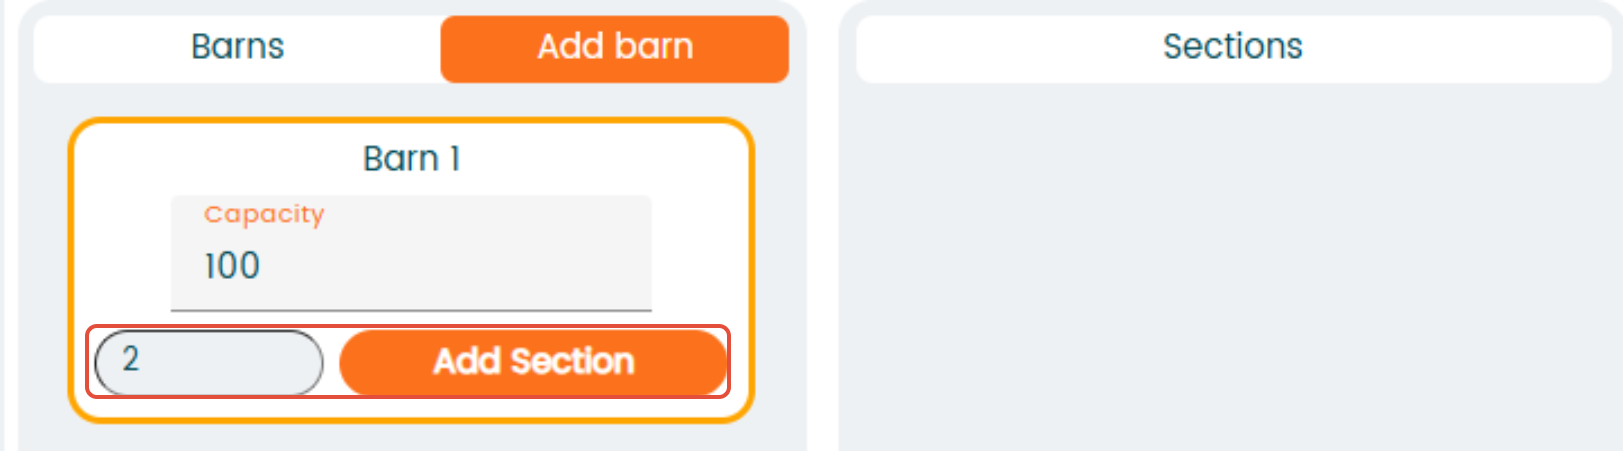
Once you have your barns set up, the next step is to create "Sections" within each barn. Sections allow you to further organize your barns into specific areas. To add a section, click the "Add section" button within the desired barn and select how many sections to add.
The final level of your hierarchy is the "Pen." Pens are used to designate specific spots within a section. To create a pen, simply click the "Add pen" button while in the relevant section.

Please note: Select Names or Numbers which are most logical for you to identify the different locations. In this example the location is called Barn 1 and the sublocations (section & pen) are named accordingly to identify them easily later in the app.
Was this article helpful?
That’s Great!
Thank you for your feedback
Sorry! We couldn't be helpful
Thank you for your feedback
Feedback sent
We appreciate your effort and will try to fix the article